
How I motorized my Ikea SKARSTA standup desk with an Arduino UNO
I happen to own an Ikea Skarsta Standup Desk, it has a nice manual crank that you can turn to raise it and lower it. It takes around 80 turns (45 seconds) each time I want to change it’s position… and I usually want to do so at least twice a day… every day. Some quick math shows it’s around 3 minutes per day turning a crank… that’s around 18 hours per year turning a crank!!!.
I had to do something about it…
Sure, one option is to scrap it and buy an Ikea Bekant Desk, which costs $449 USD, or around twice as much as the manual one.
But I already had mine plus I’m an engineer, so I thought hey… maybe I can hack it?.
And that’s what I did.
I include the cost of the components below, but many of these you probably already have if you’ve ever done any other electronics projects, you know, like in college?. Anyway, if you already have stuff like an old breadboard and some jumper wires then you can look at spending around $100 bucks for the minimum components, but the cost may go a bit higher if you need to purchase every little tool for the job. Still keep in mind that if you spend $10 bucks on a bunch of resistors you can probably use those for life for other projects, so I wouldn’t factor the whole cost in.
The main idea
Since we’re using an Arduino I decided to go beyond simply motorizing it and actually implement a feature to be able to record the time it takes to raise and lower the desk, then through some button combination trigger the auto-raise and auto-lower mode for a fully automated experience!. Of course we should also be able to simply press the buttons to manually raise / lower the desk. I also wanted an On/Off main switch so that I could turn the whole thing off in case something went haywire, and a LED to indicate if you are in program mode or in auto-raise mode, as well as to handle internal error states and communicate in general to the user.
So what’s the Torque?
A quick calculation using a kitchen scale to measure the force applied on the crank revealed we need about 2Nm (20.4 kg.cm) of torque to successfully raise the desk. Therefore we need either a single motor that has that much torque and can sustain it for about half a minute, or two motors with a lower torque. I was only able to find smaller motors online so I went with 2 of these.
Required Components:
- Arduino Uno - $23
- L298N Motor Driver - $8
- 2 x 24v DC Motors (23kg.cm torque) - $50
- 2 x L-Bracket for Motor - $8
- 29v AC/DC Adapter - $22
- LM2596S Step Down Buck Converter - $6
- Push Buttons - $2
- 2 x Motor Shaft Coupling (6mm to 8mm) - $7
- Barrel Jack to Cable adapter - $8
- Junction Box (replaceable) - $9 (you may need a larger one if you want a more comfortable fit of the components, I’d recommend you to buy this until you’re almost ready to assemble so you can take some final measurements, you may also choose to use some other box you already have)
Stuff you may already have:
- Solderless Breadboard - $2
- 10k, 330 OHM Resistors - $8 (kit)
- Jumper Wires - $9 (kit)
- Male to Female Jumper Wires - $5 (kit)
- 6mm Allen Wrench (optional) - $3
- On/Off Switch (optional) - $1
- A LED Diode (optional) - $1
STEP 1: Load the program!
The Arduino program is the software that waits for a button to be pushed, when it detects it, it sends the appropriate PWM signal to the motor to power it, effectively raising and lowering your desktop. Arduino also has an internal EEPROM memory which we will use to store recorded programs (optionally).
- Install the Arduino UNO IDE
- Download the MotorControl code from My Repo (master branch)
- Plug in the Arduino to your computer using an Arduino USB Cable, also known as a printer cable
- Compile and Load the code onto the Arduino using the IDE respective buttons
- Unplug the Arduino
Note on usage: Please read the comments on the ‘MotorControl.ino’ file for detailed explanation about engaging program mode and auto-raise/auto-lower if you plan on using that feature
STEP 2: Adjust the voltage input for Arduino
We need to adjust the output voltage from the buck converter, Arduino can handle up to 12 volts, if you feed it 29 volts I suspect you may fry it.
To do this, simply plug in the power (using the Barrel Jack to Cable adapter with 2 cables) to Vin, look at the display on the buck converter and use the little golden screw to adjust the voltage until it reads 5v.
STEP 3: Wire it up!
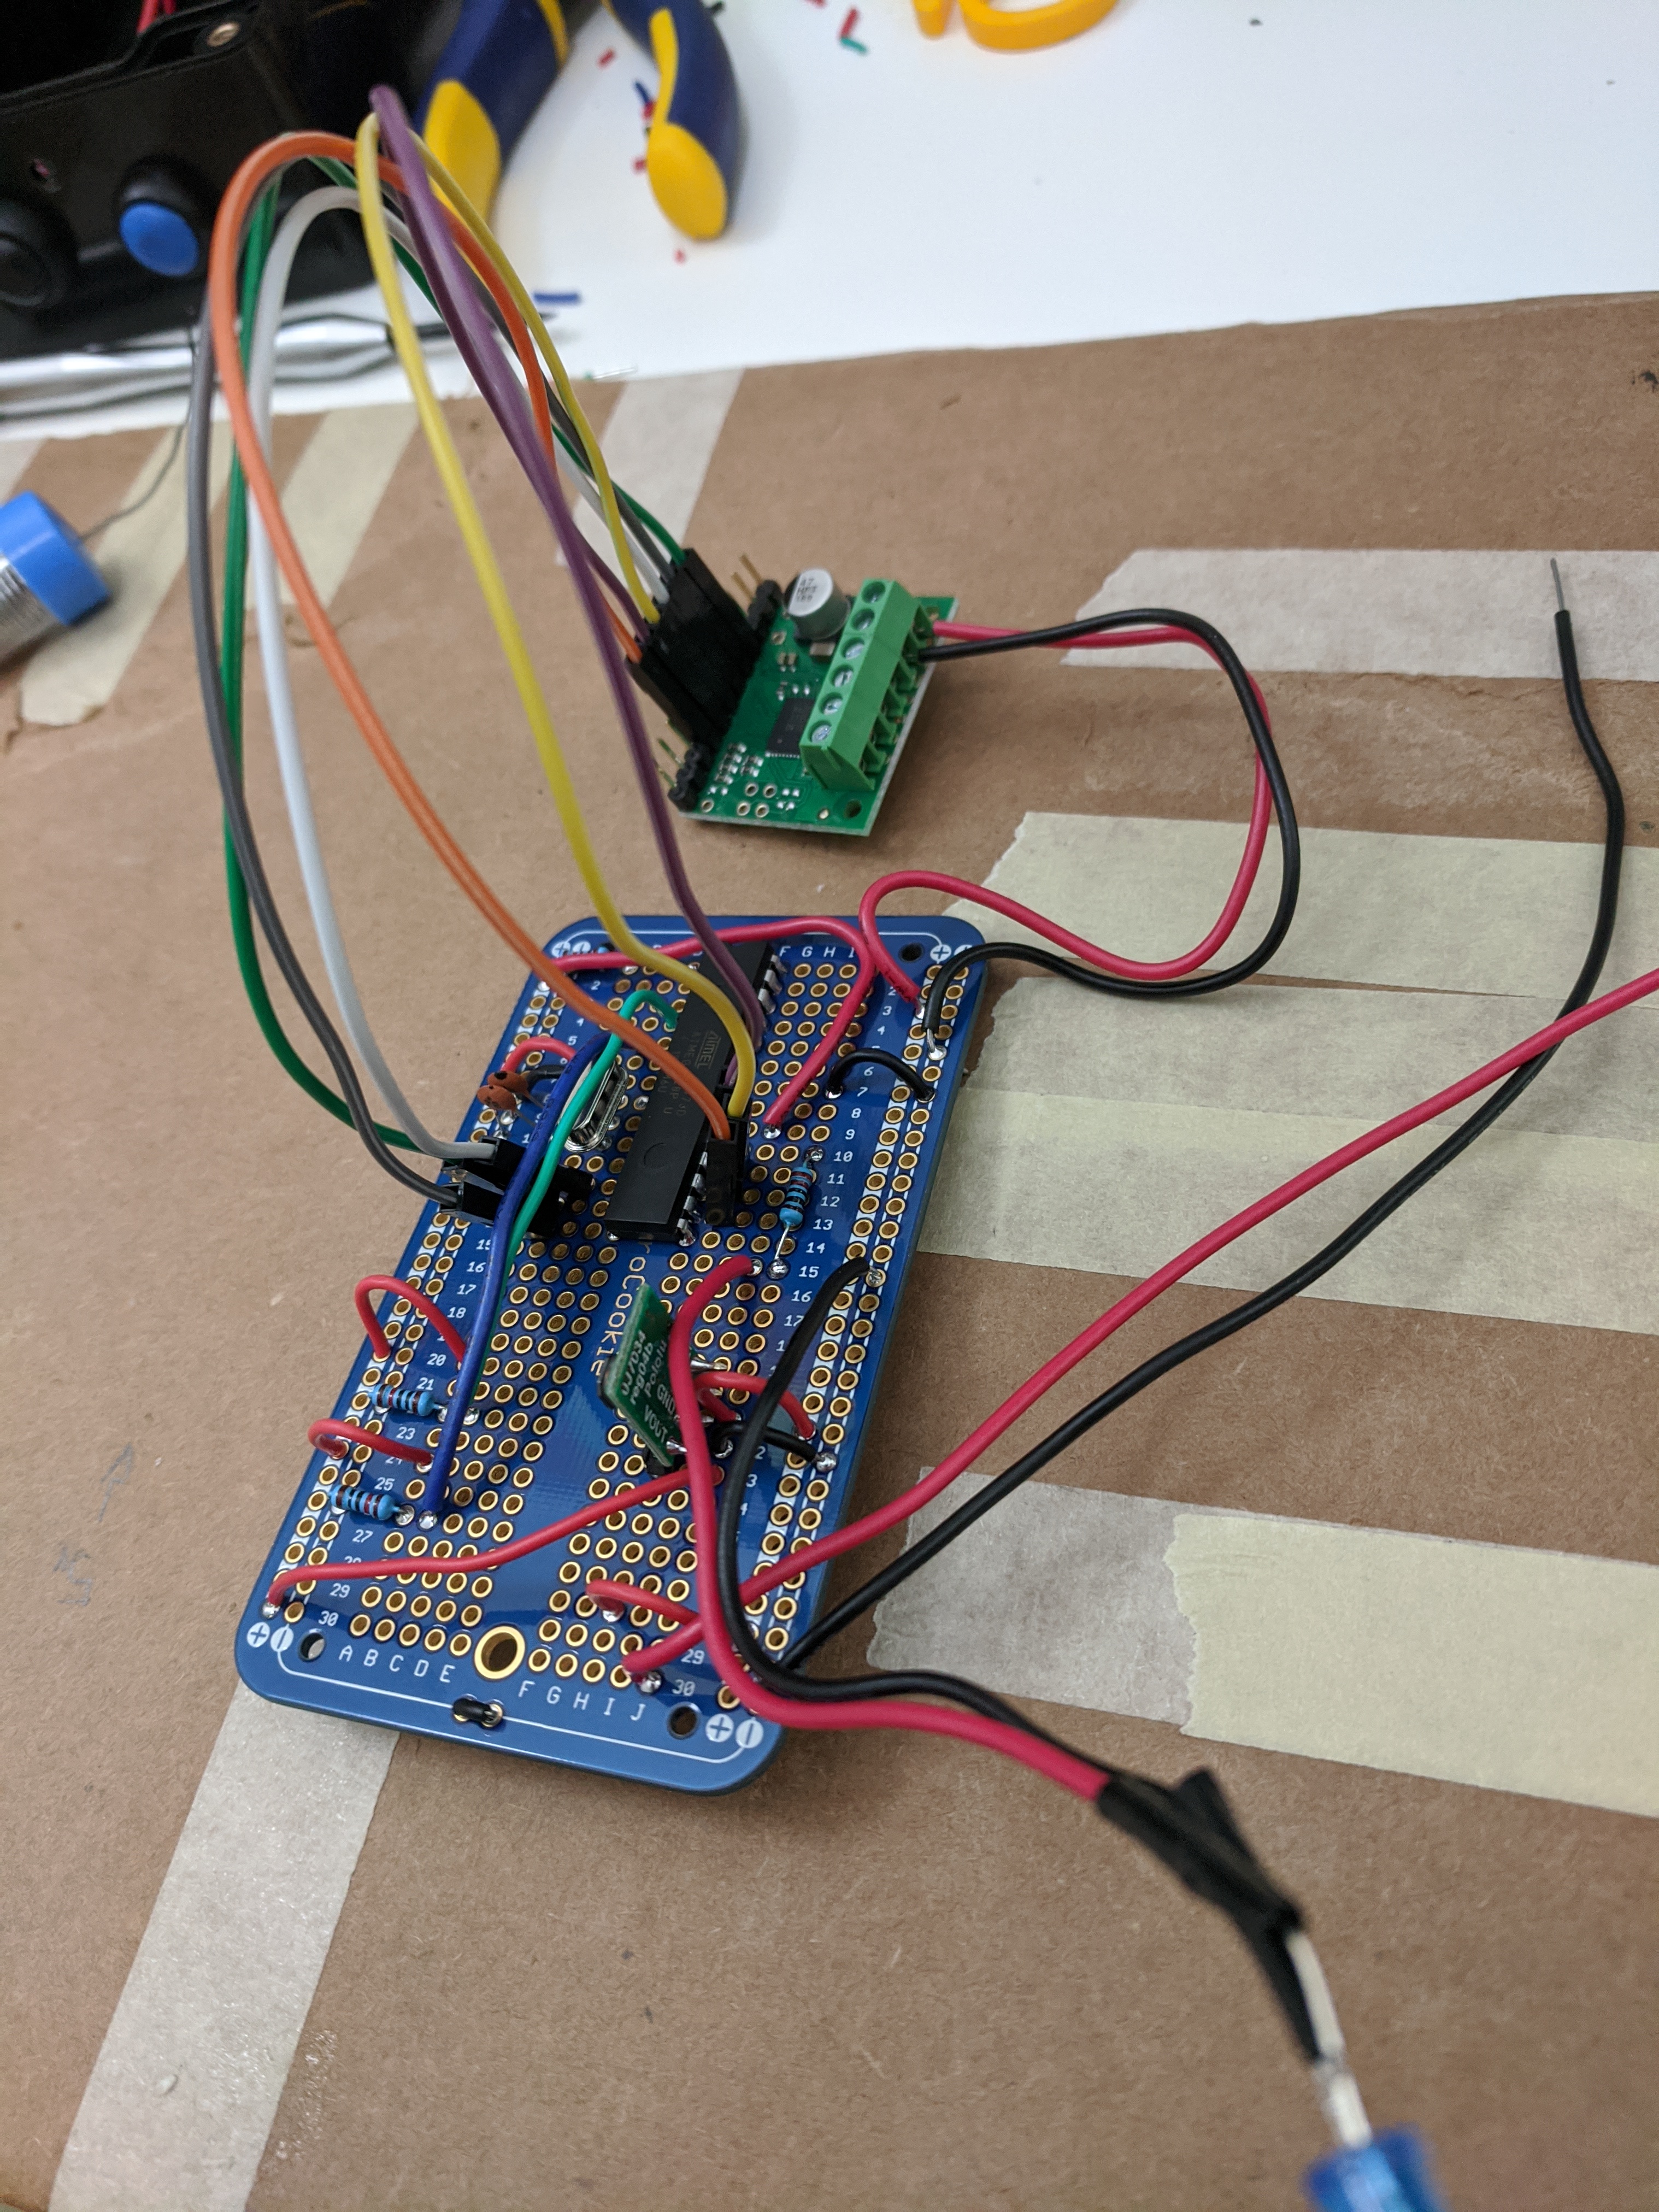
Grab your breadboard, Arduino, L298N, LM2596, Motors, two buttons, the resistors, the barrel jack cable adapter and a bunch of jumper wires and wire it up as per the circuit diagram below.
 Right click + Open in new tab for a larger image
STEP 4: Dry Test
At this point it should be safe to plug in the 29v power adapter onto the circuit (make sure you followed STEP 2 before doing this). The circuits should turn on and if you press the buttons the motor should turn. You may be wondering why I chose a 29v power pupply, as it turns out the L298N drops around 5 volts in this particular setup, and I want the full 24 volts to reach the motor.
Note: I took the following picture and video a bit later in the process, but I highly recommend that you test the circuit with the motors before installing them onto the desk. To perform the dry test, simply connect everything and give it a shot!. P.S. Check out that automated raise! ;)

I recommend testing the whole setup for a few days - fully plugged in and with motors in place - before putting it on the enclosure and installing it in the final location.
Note: You can tweak the values of the UP and DOWN speed in the program you loaded onto the Arduino, it’s documented in there. if you feel the desk is going too fast - possibly because you don’t have as much weight as I do - then play with some different values and re-load the program
STEP 5: Assemble Other Hardware
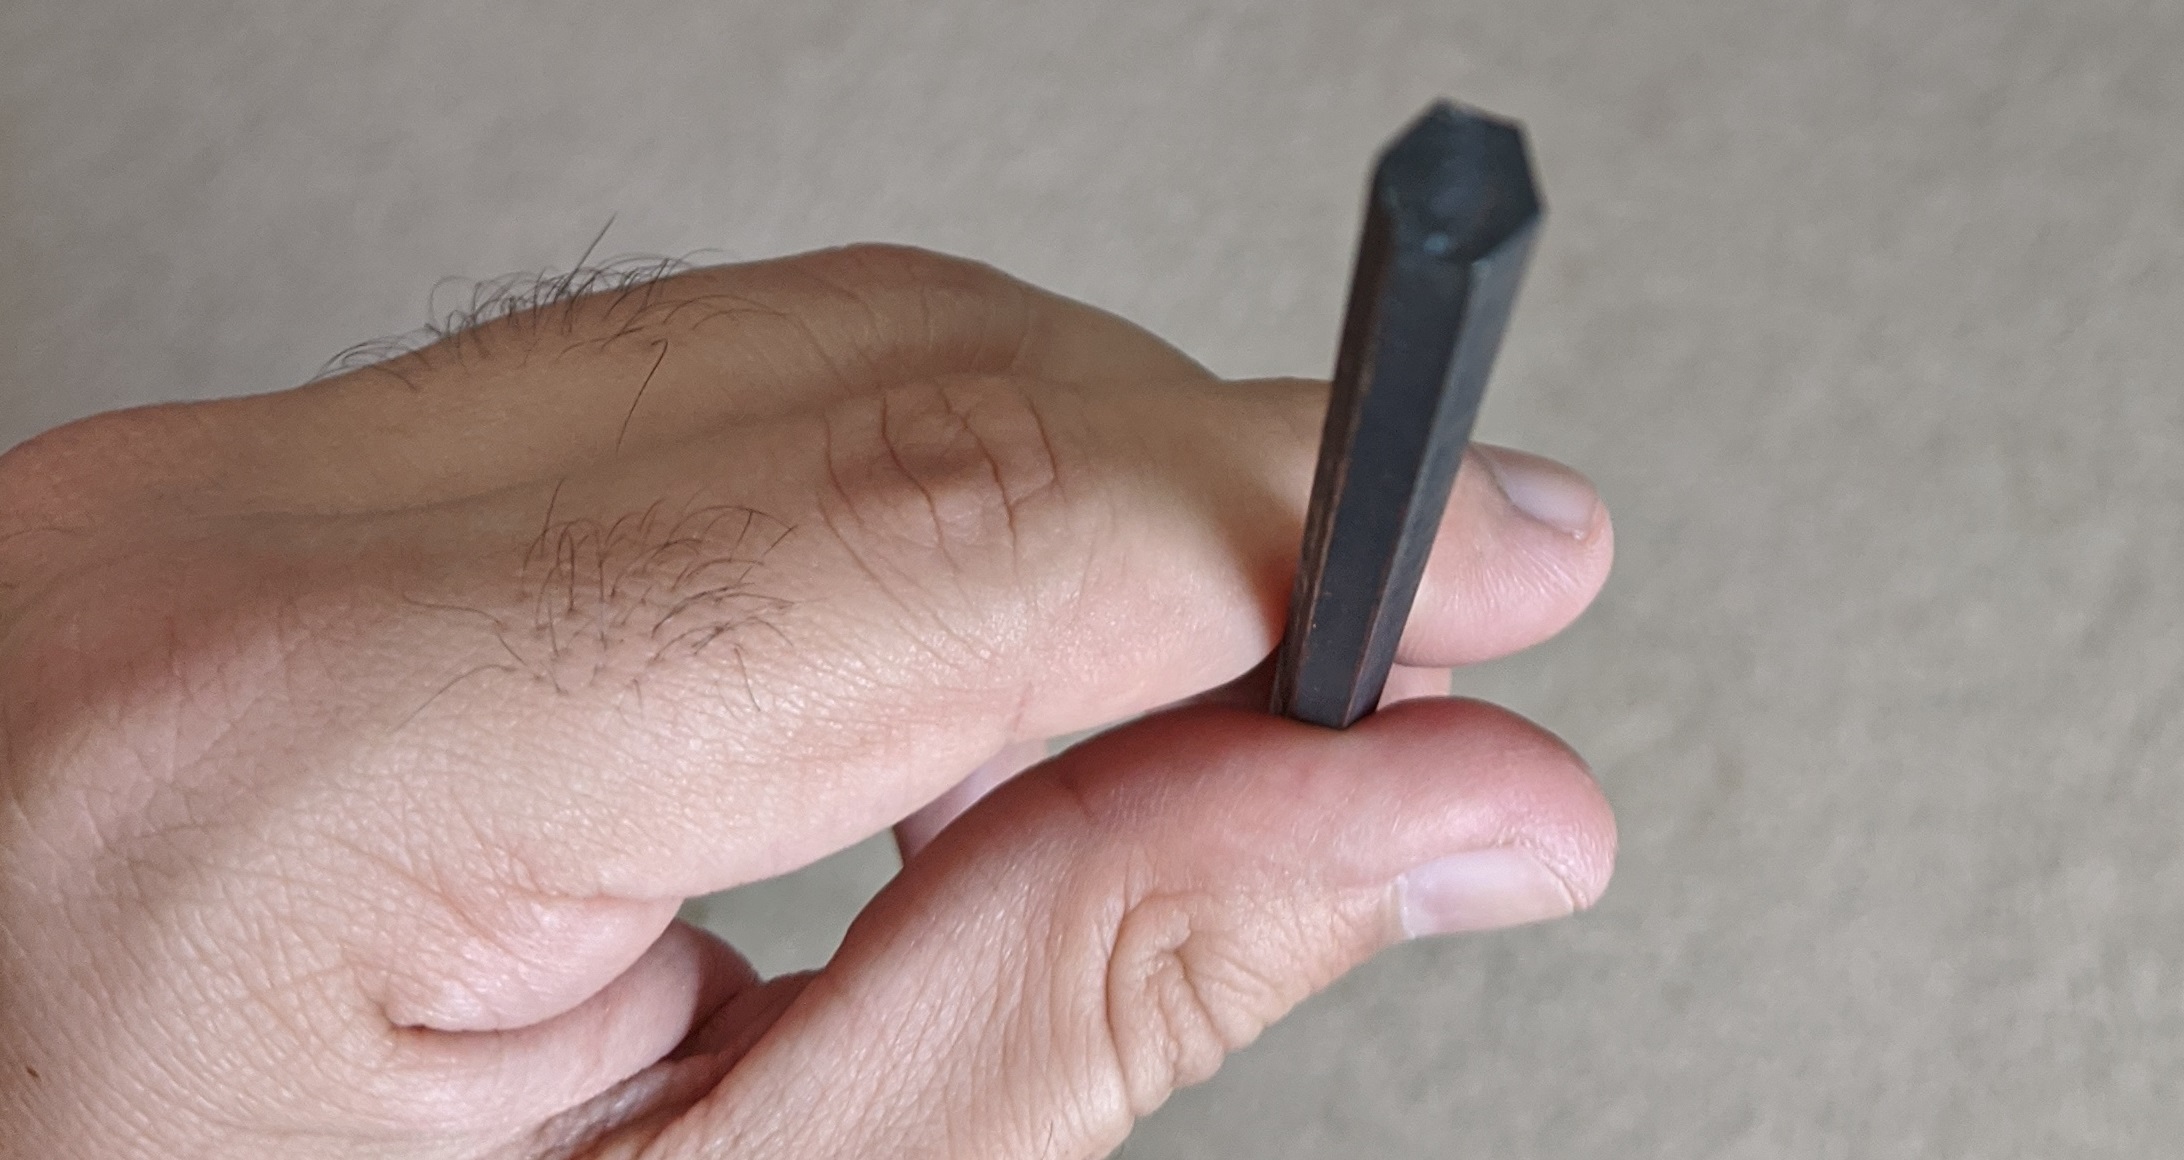
I opted for buying a large-ish 6mm Hex allen wrench and cutting the handle with a Dremel tool so that I didn’t need to cut the actual crank that came with the desk, this is for emergency reasons, if our setup stops working you can always pull out the old crank and still have a functioning desktop.
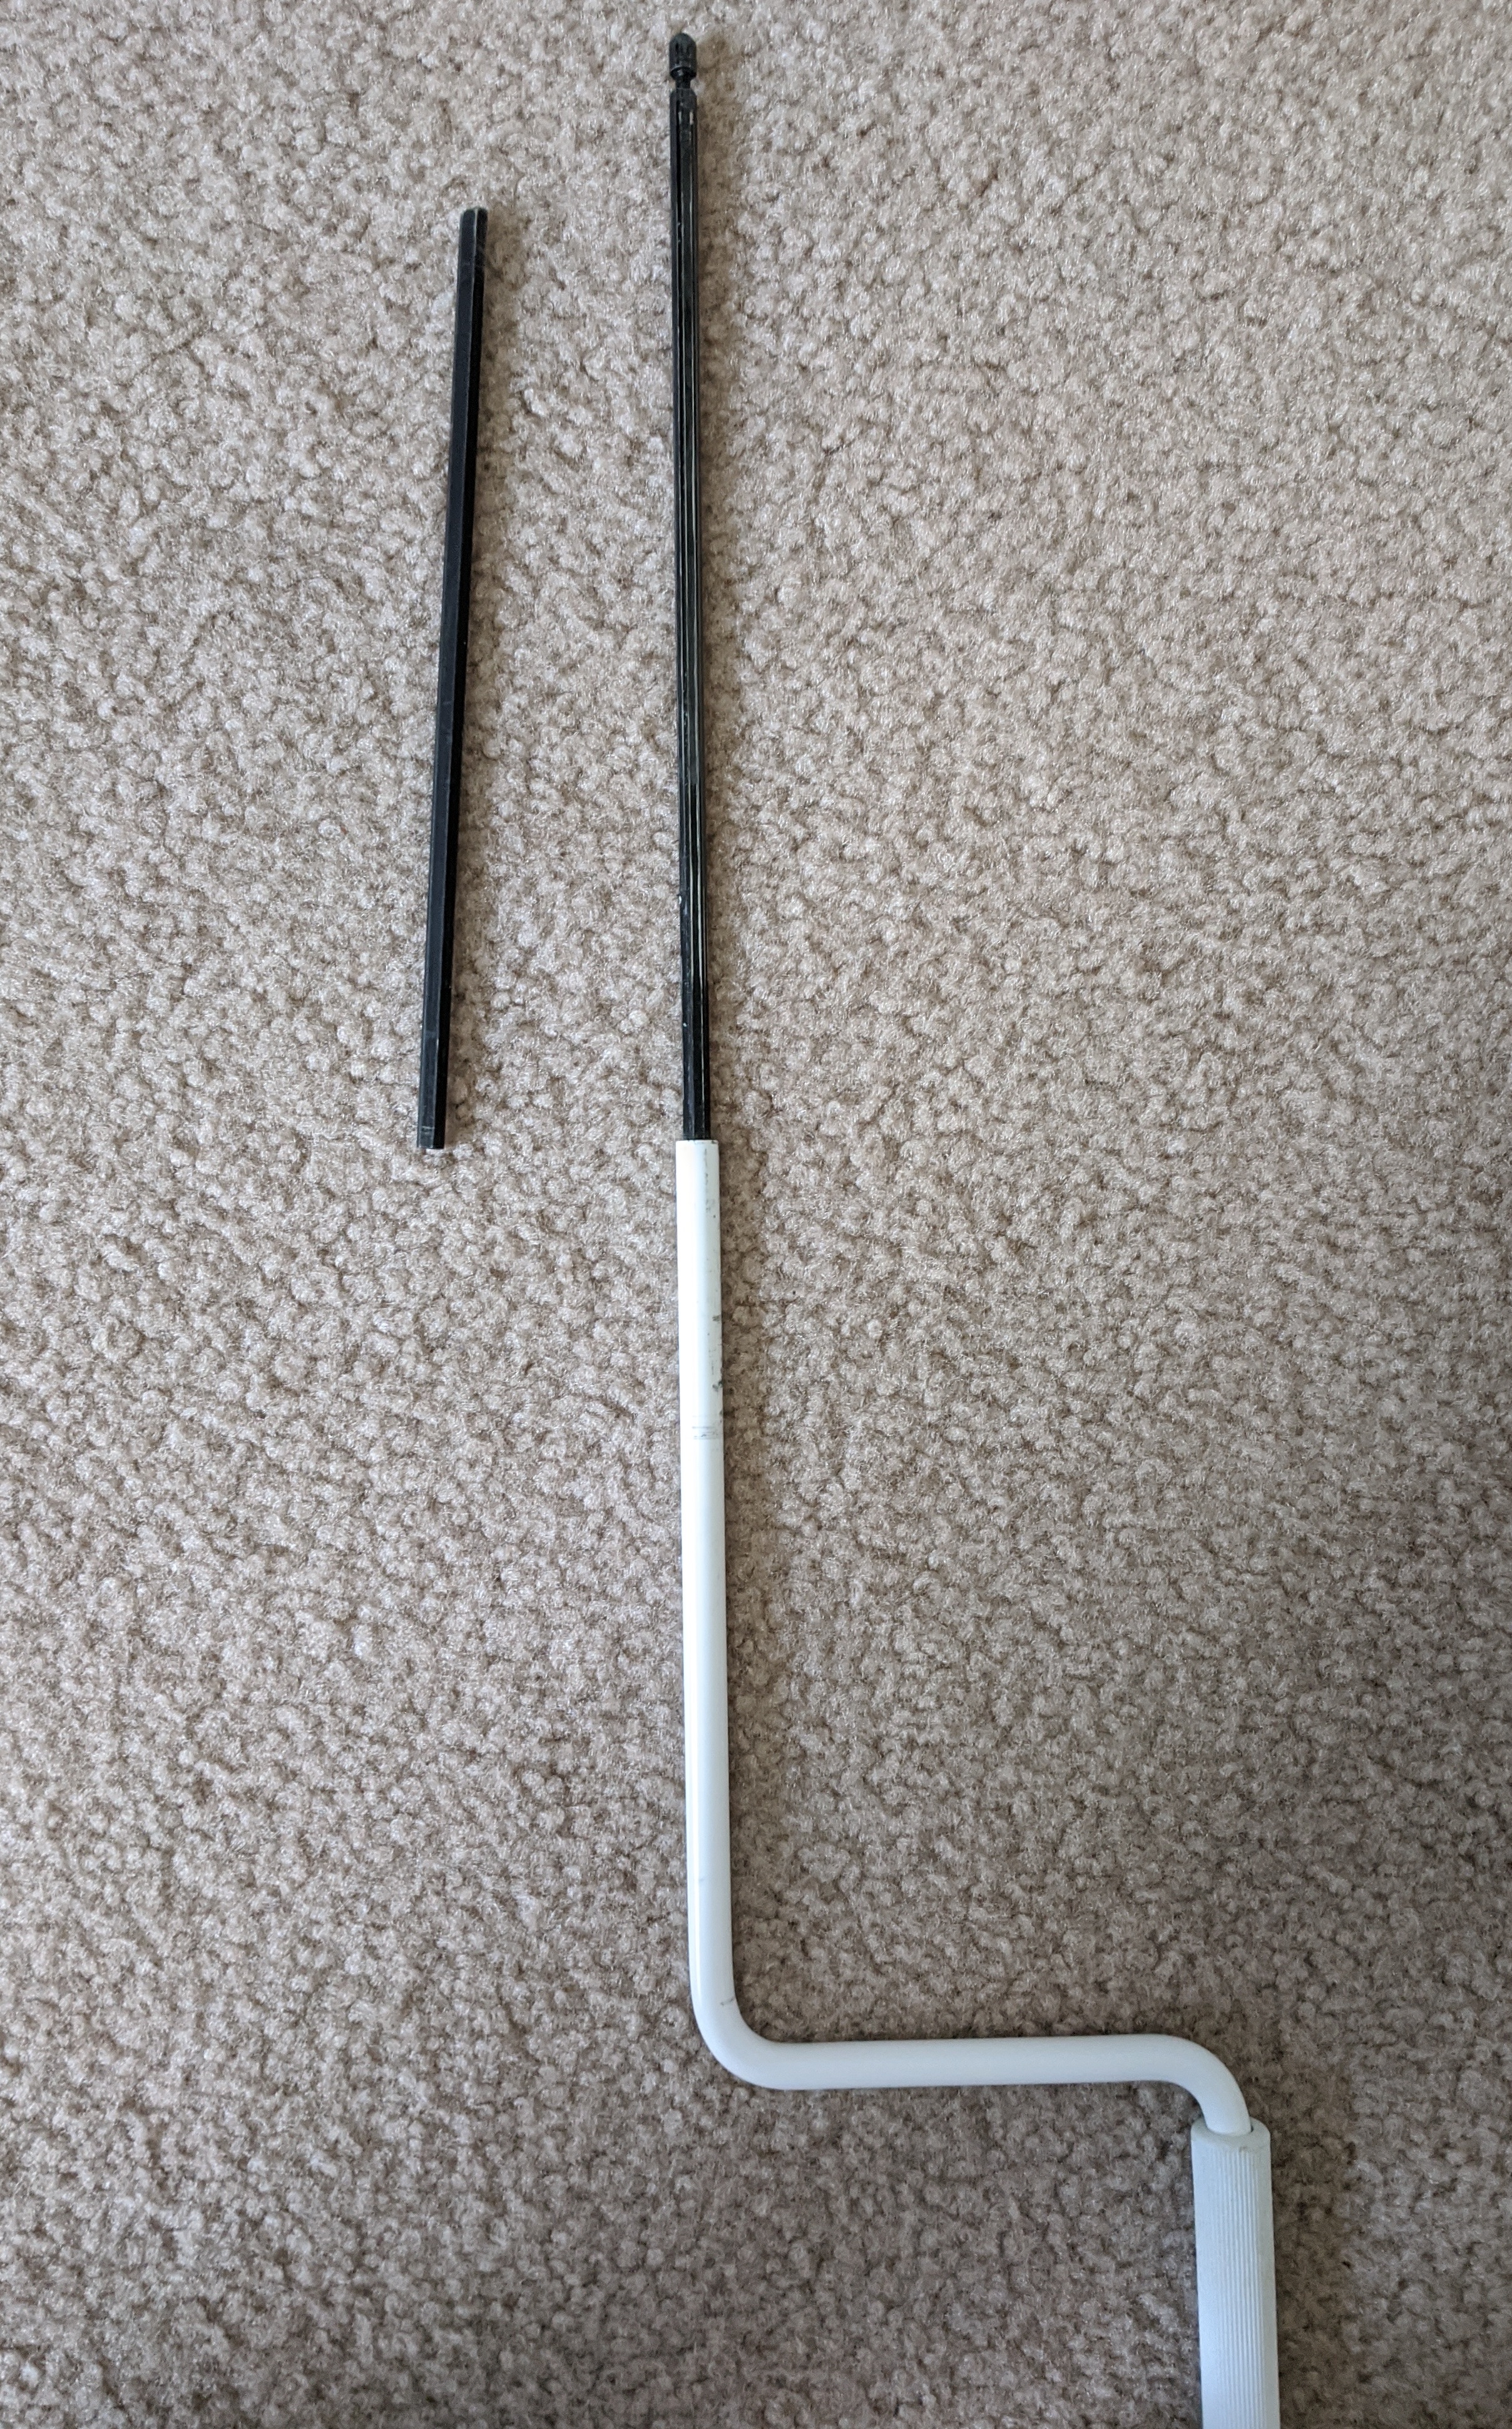
Plug in the crank / wrench to the Motor Shaft using the Coupling:
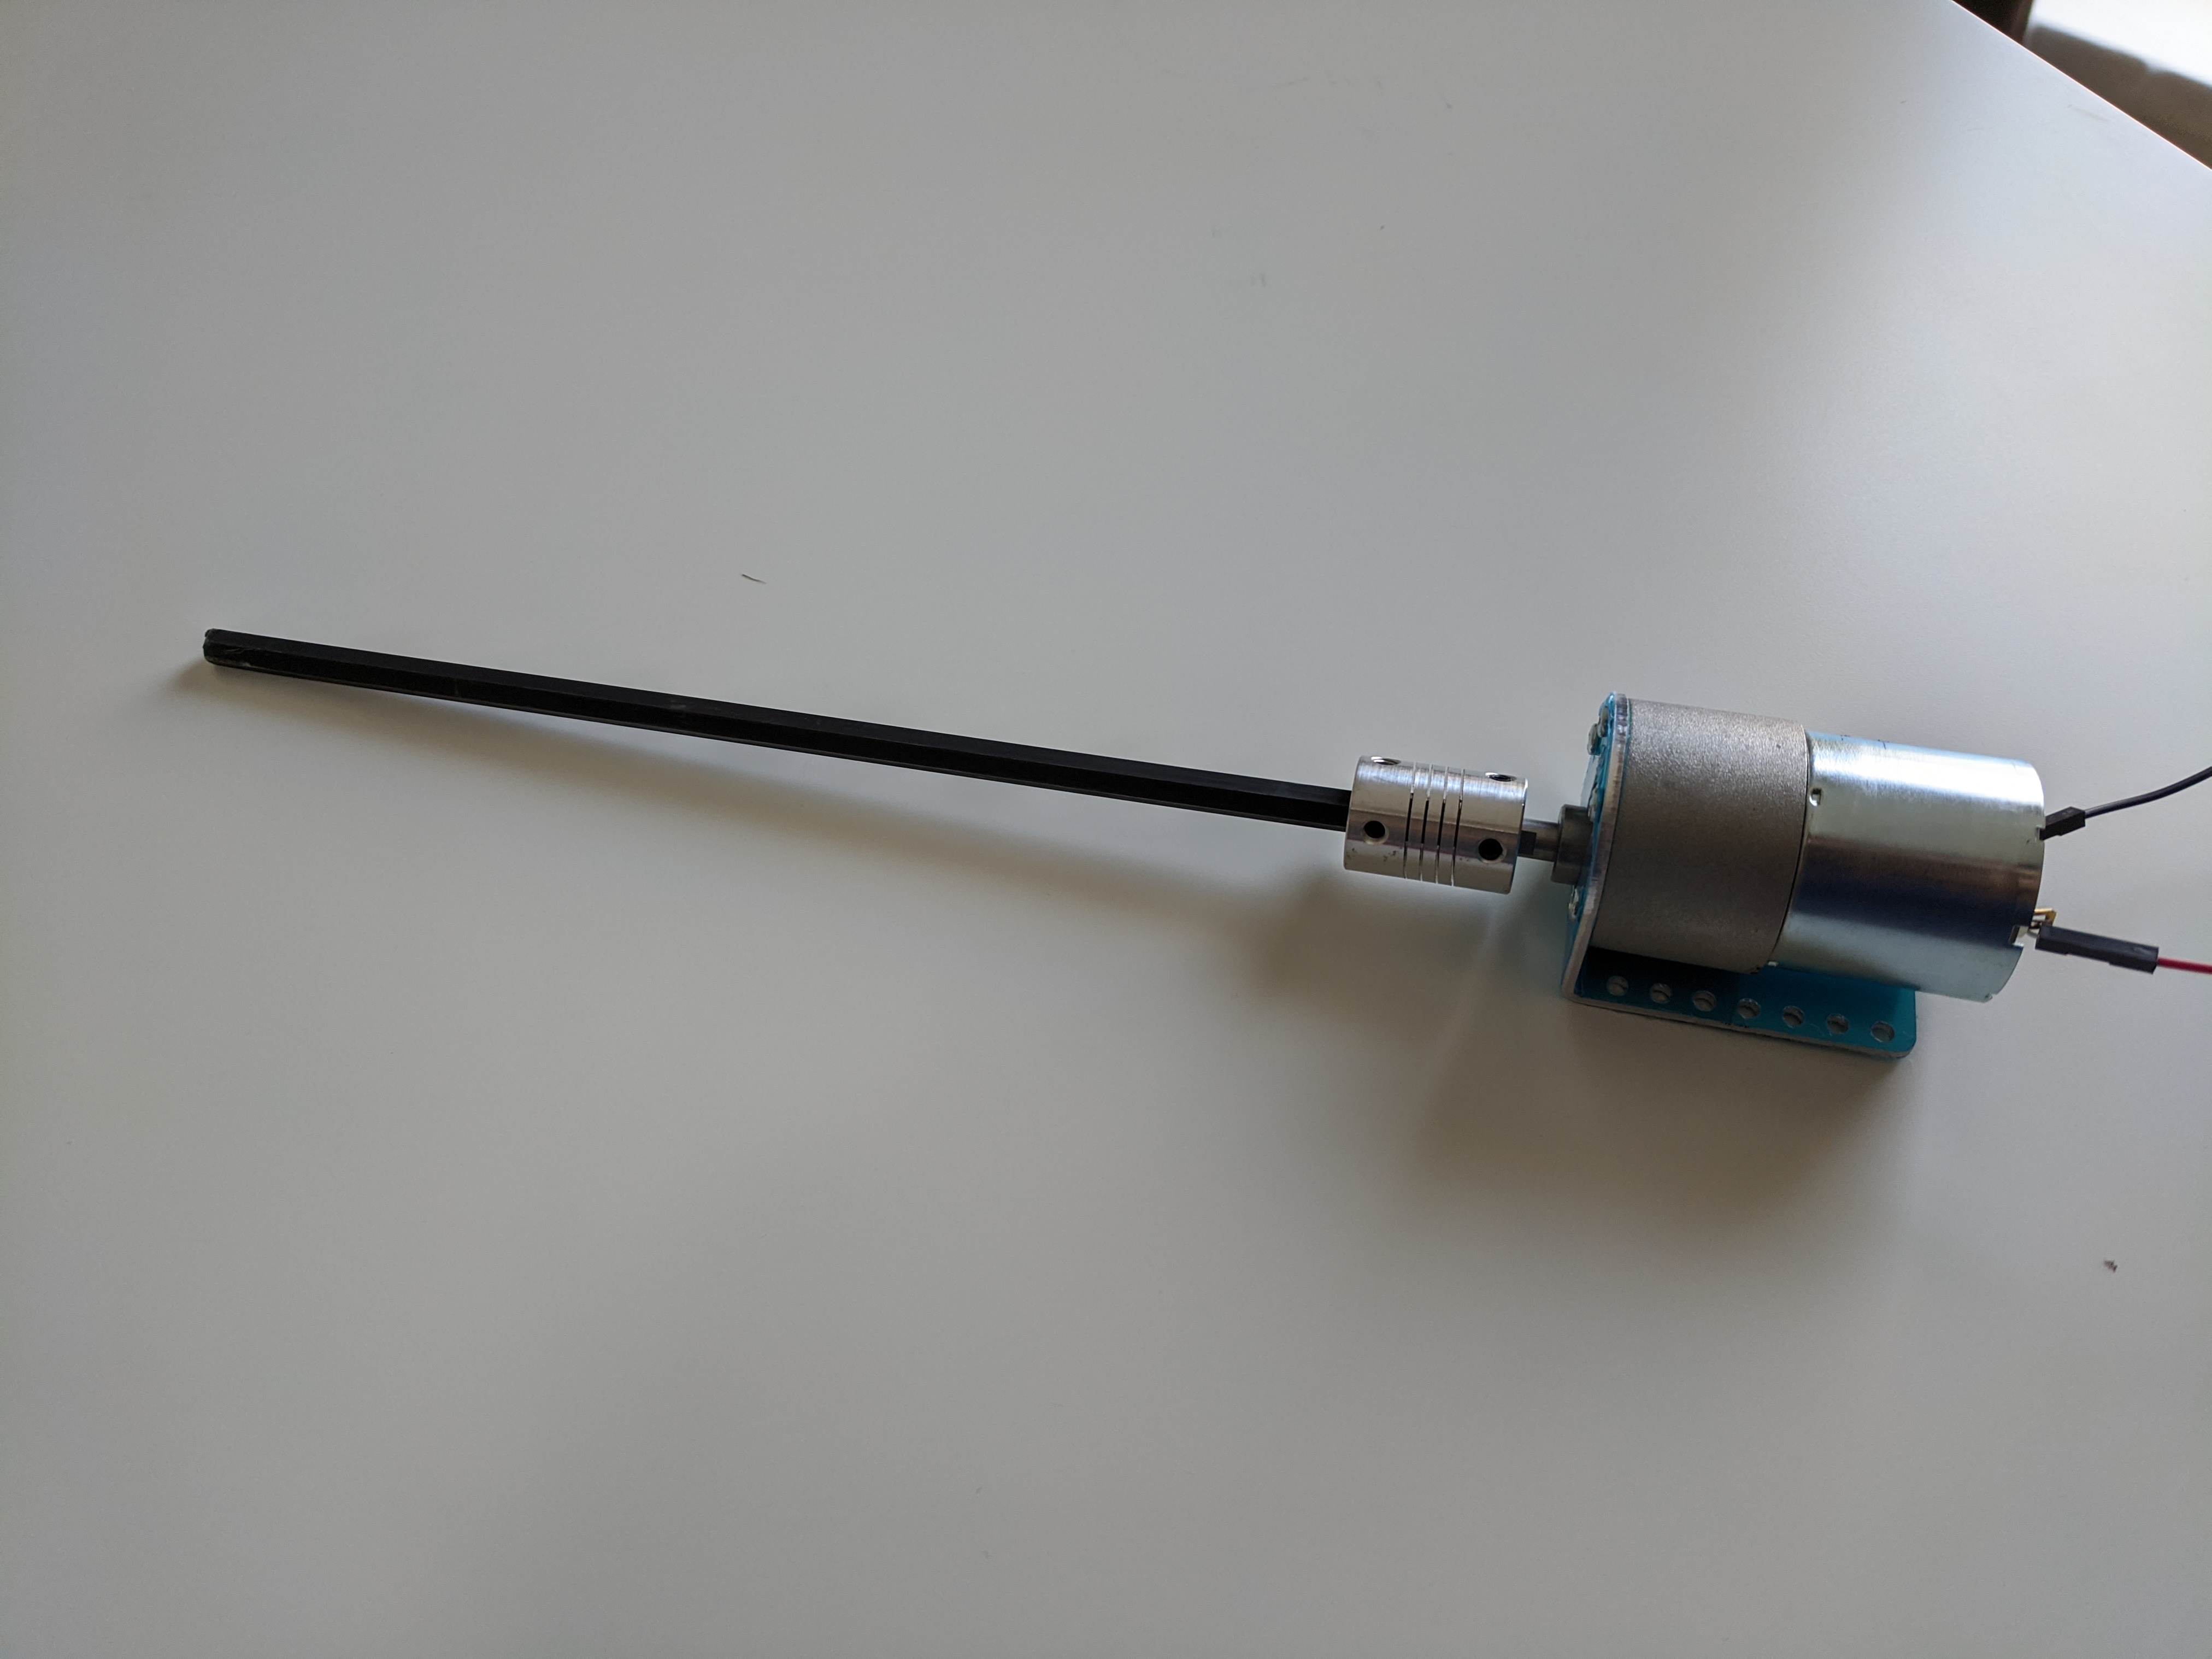
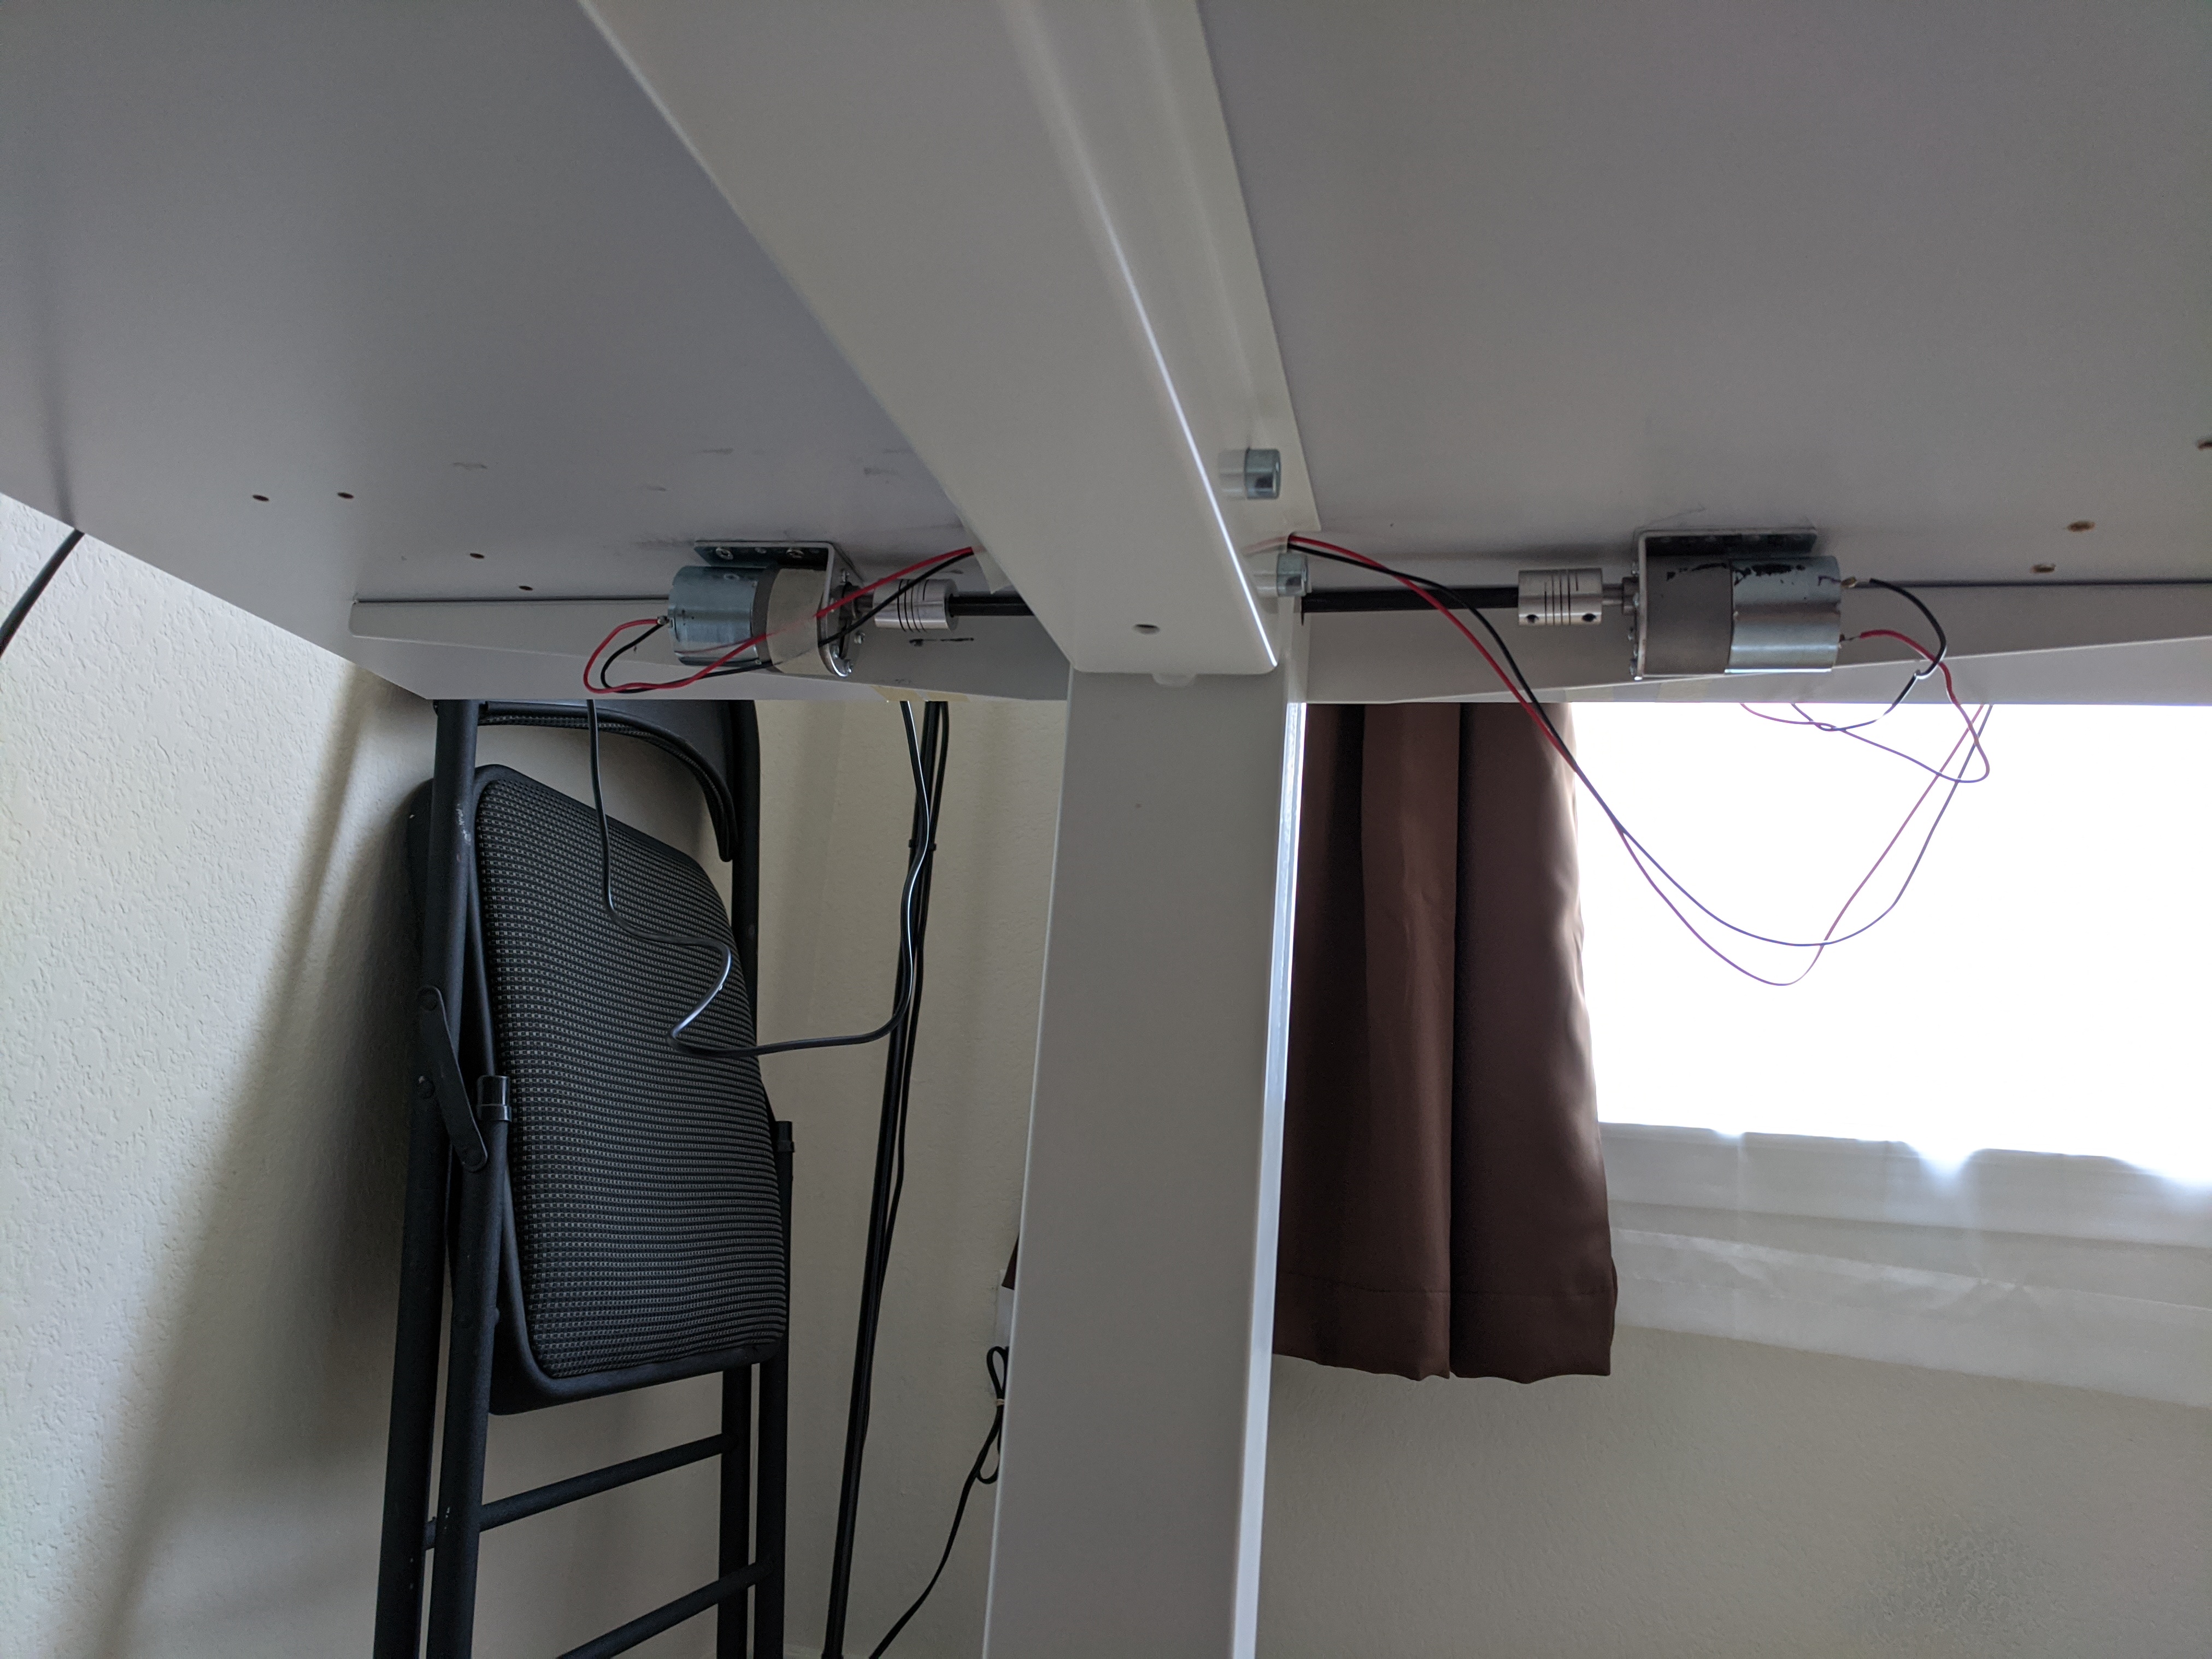
Remove the manual crank, insert the shaft, take measurements for where the bracket holes will be drilled and positioned. Install the brackets first, then the coupling, and finally the motors.
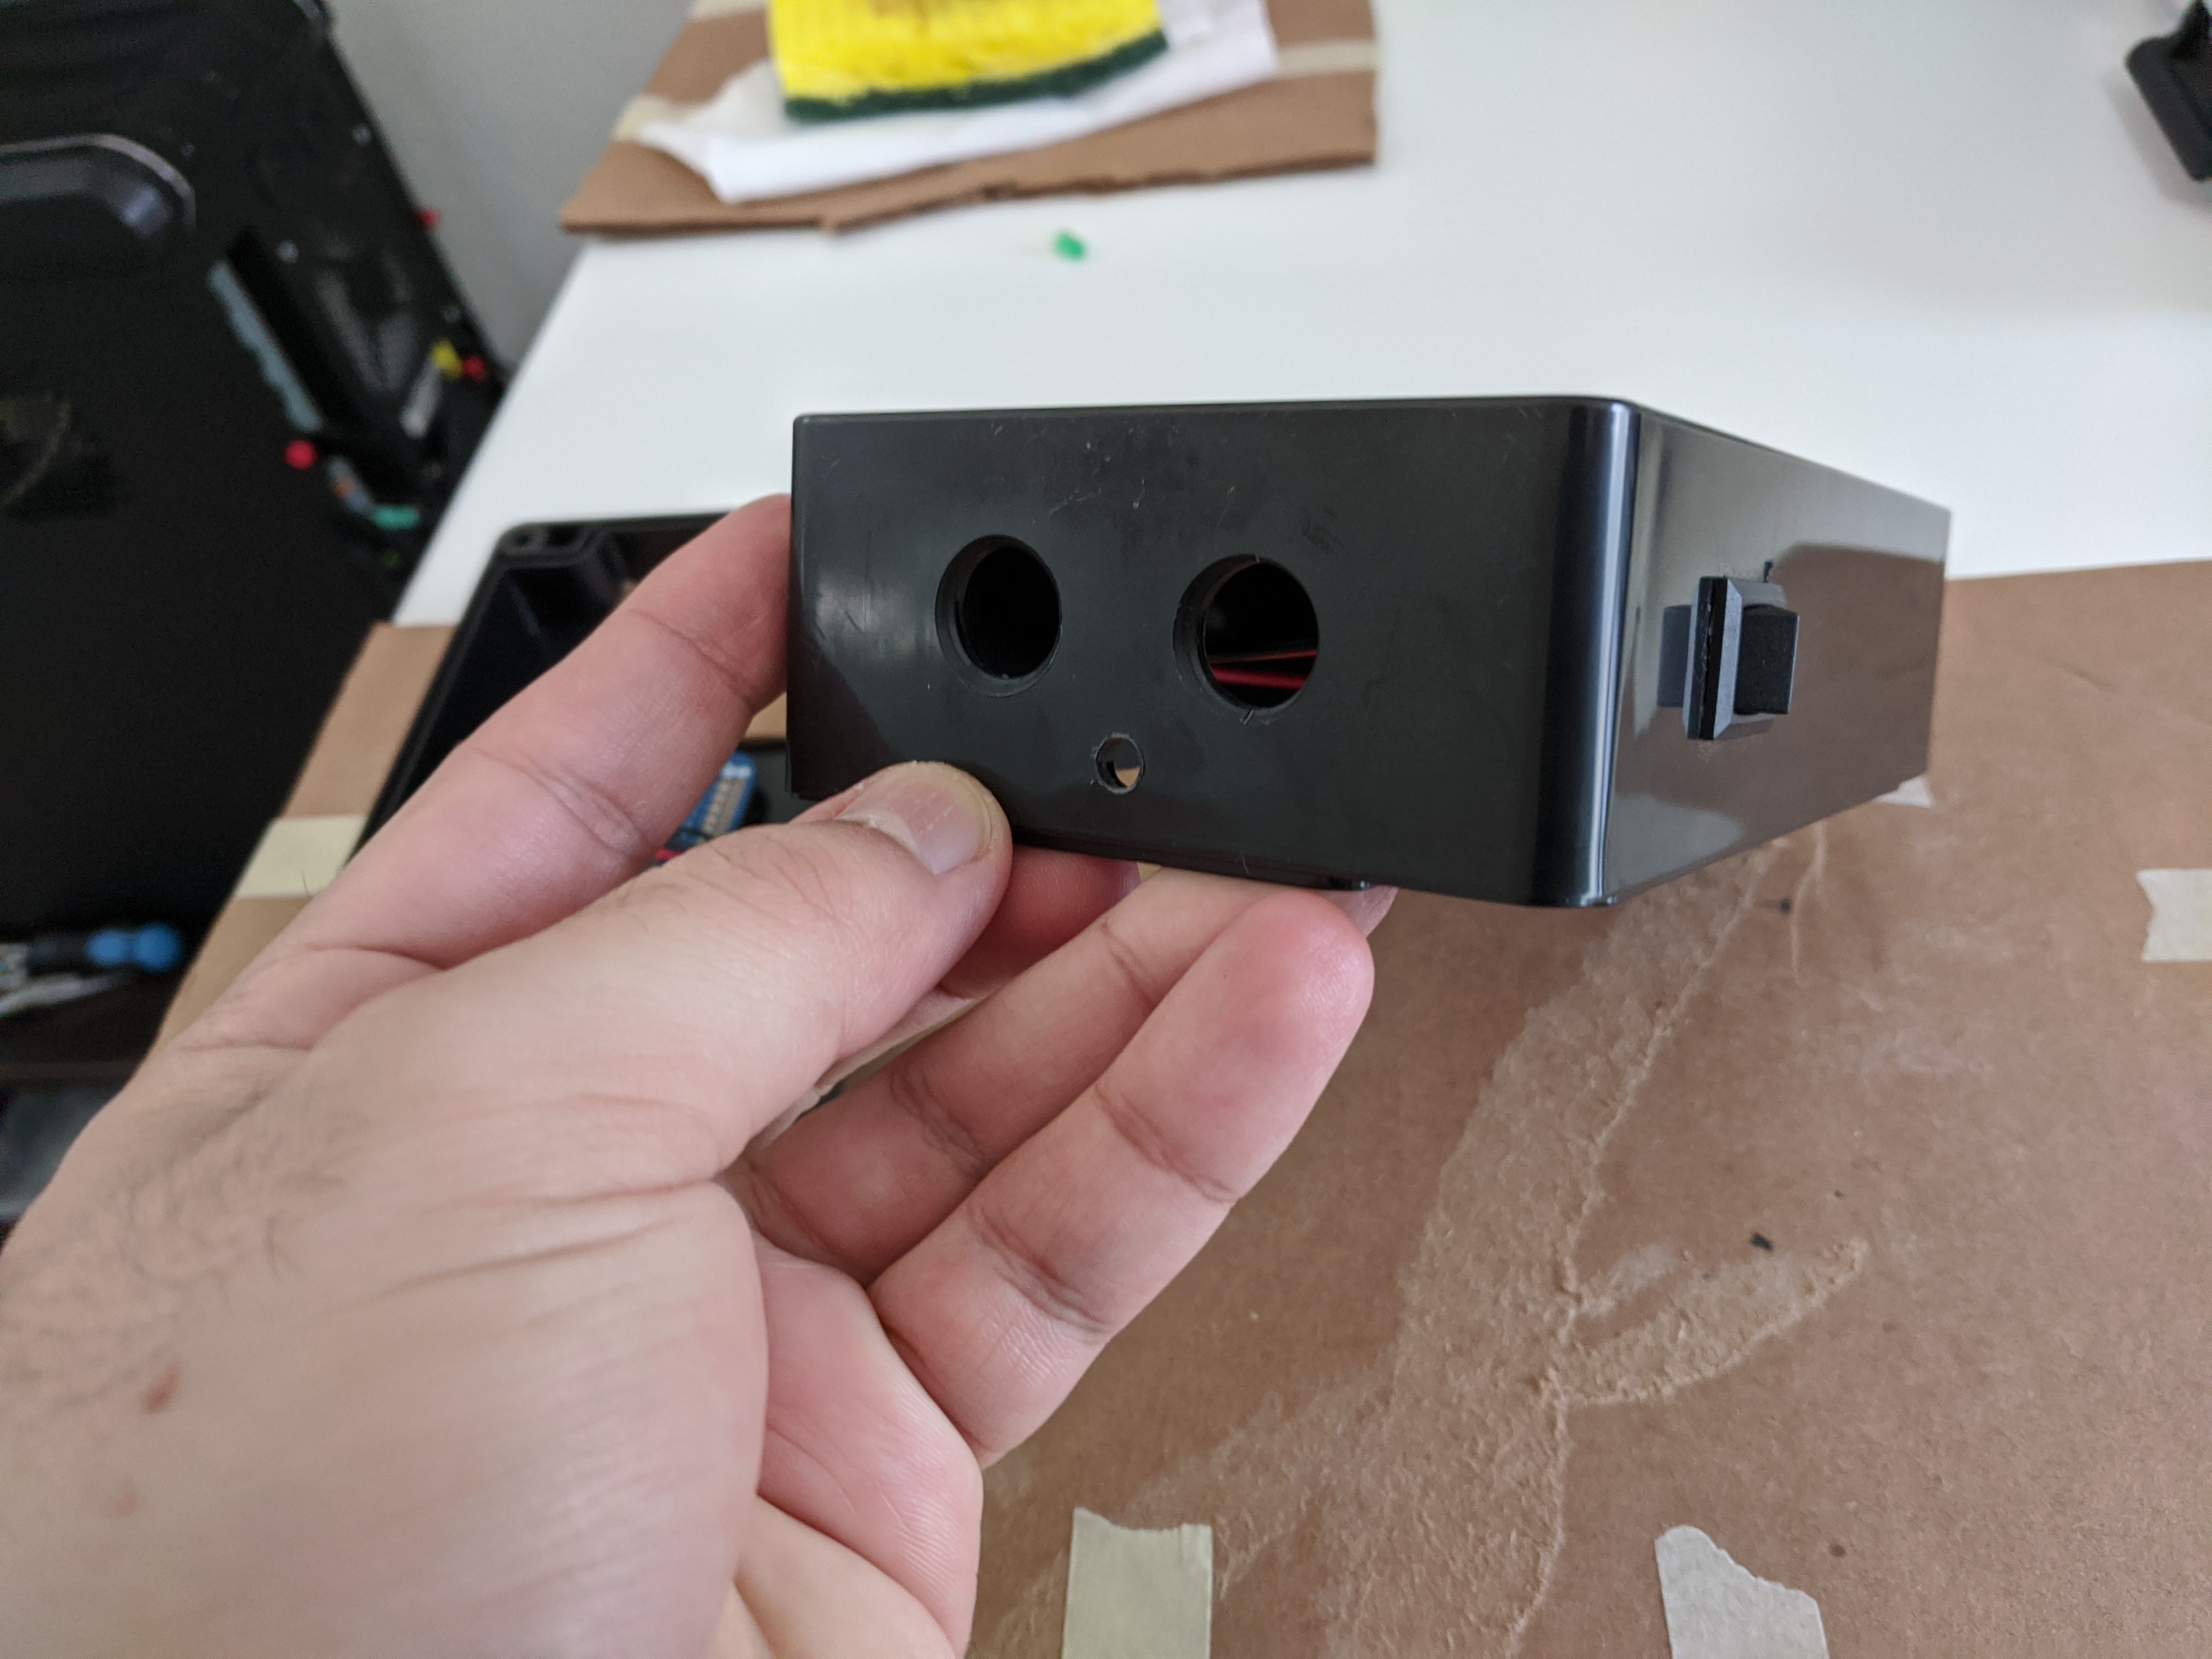
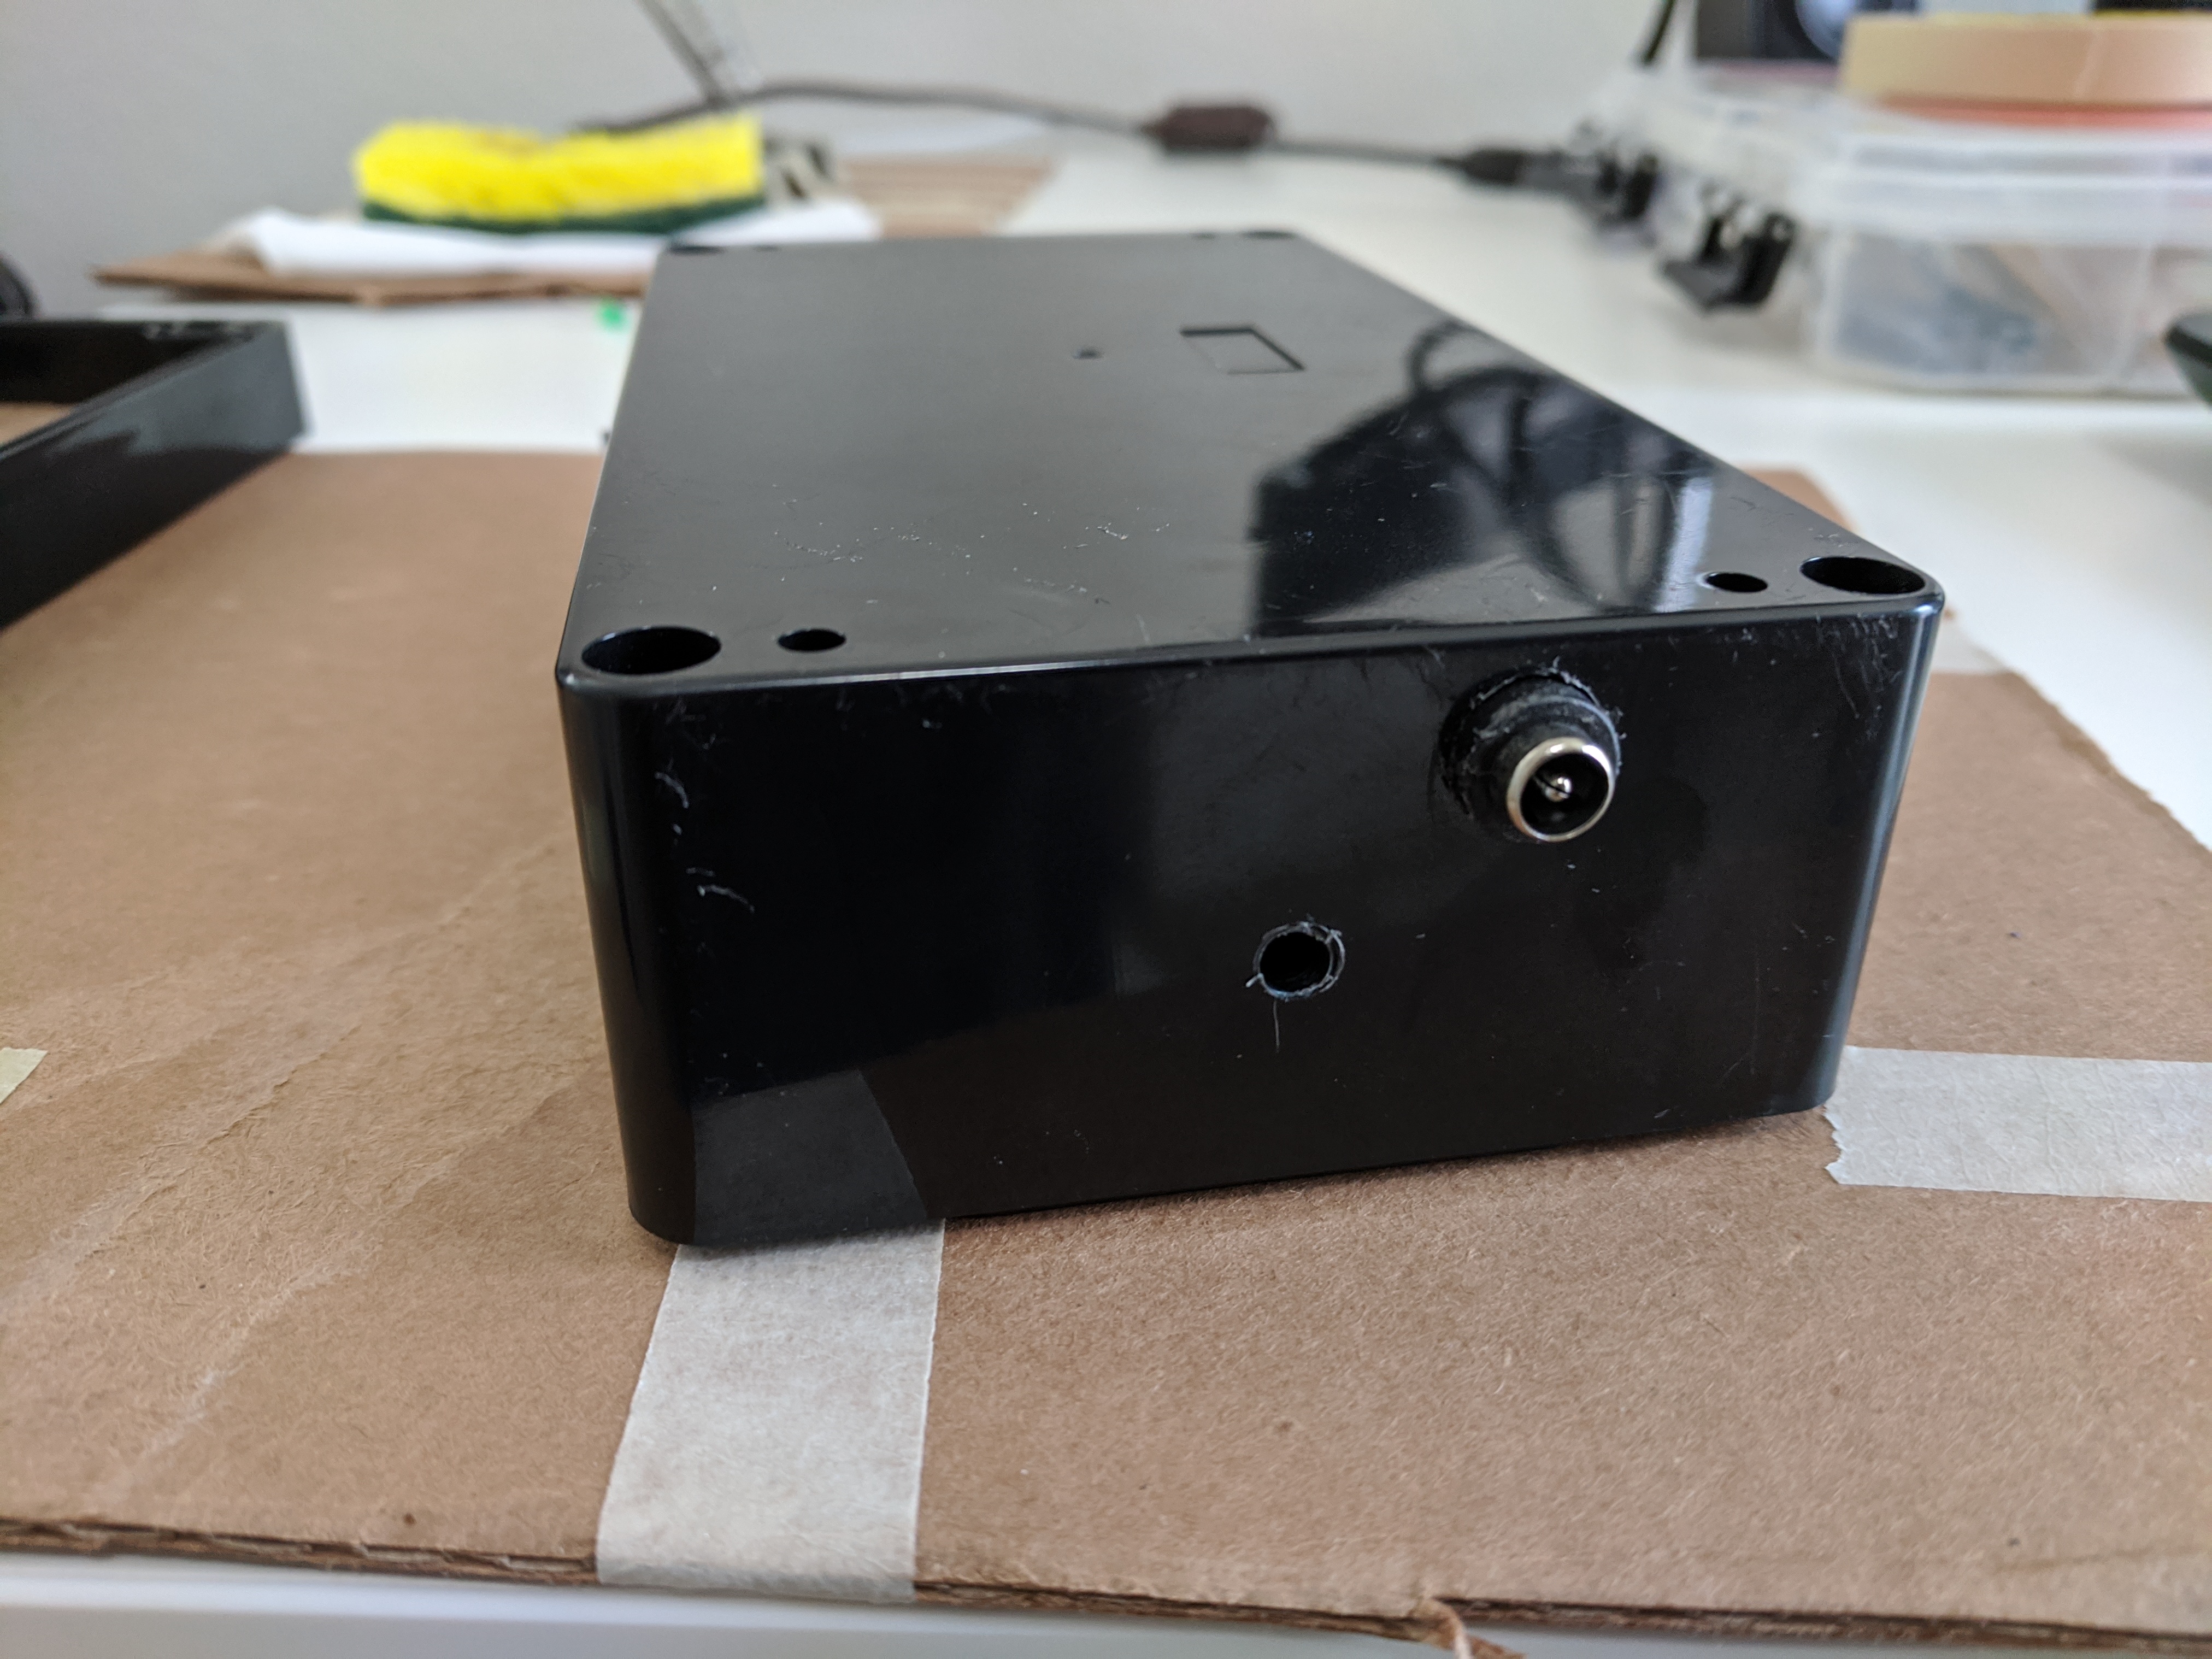
Drill some holes on the enclosure (I used a 1/2” drill bit for the button holes). If you are installing the on-off switch, then you’ll need to figure out a way to drill a square hole. I used a thin drill bit and drilled a bunch of small holes following the perimeter of the desired square hole, and then pushed the rectangle and sanded it. Remember to also drill a small hole in the front If you’re installing the LED, and 2 holes on the back for the cables coming in and for the DC adapter
STEP 6: Finishing up!
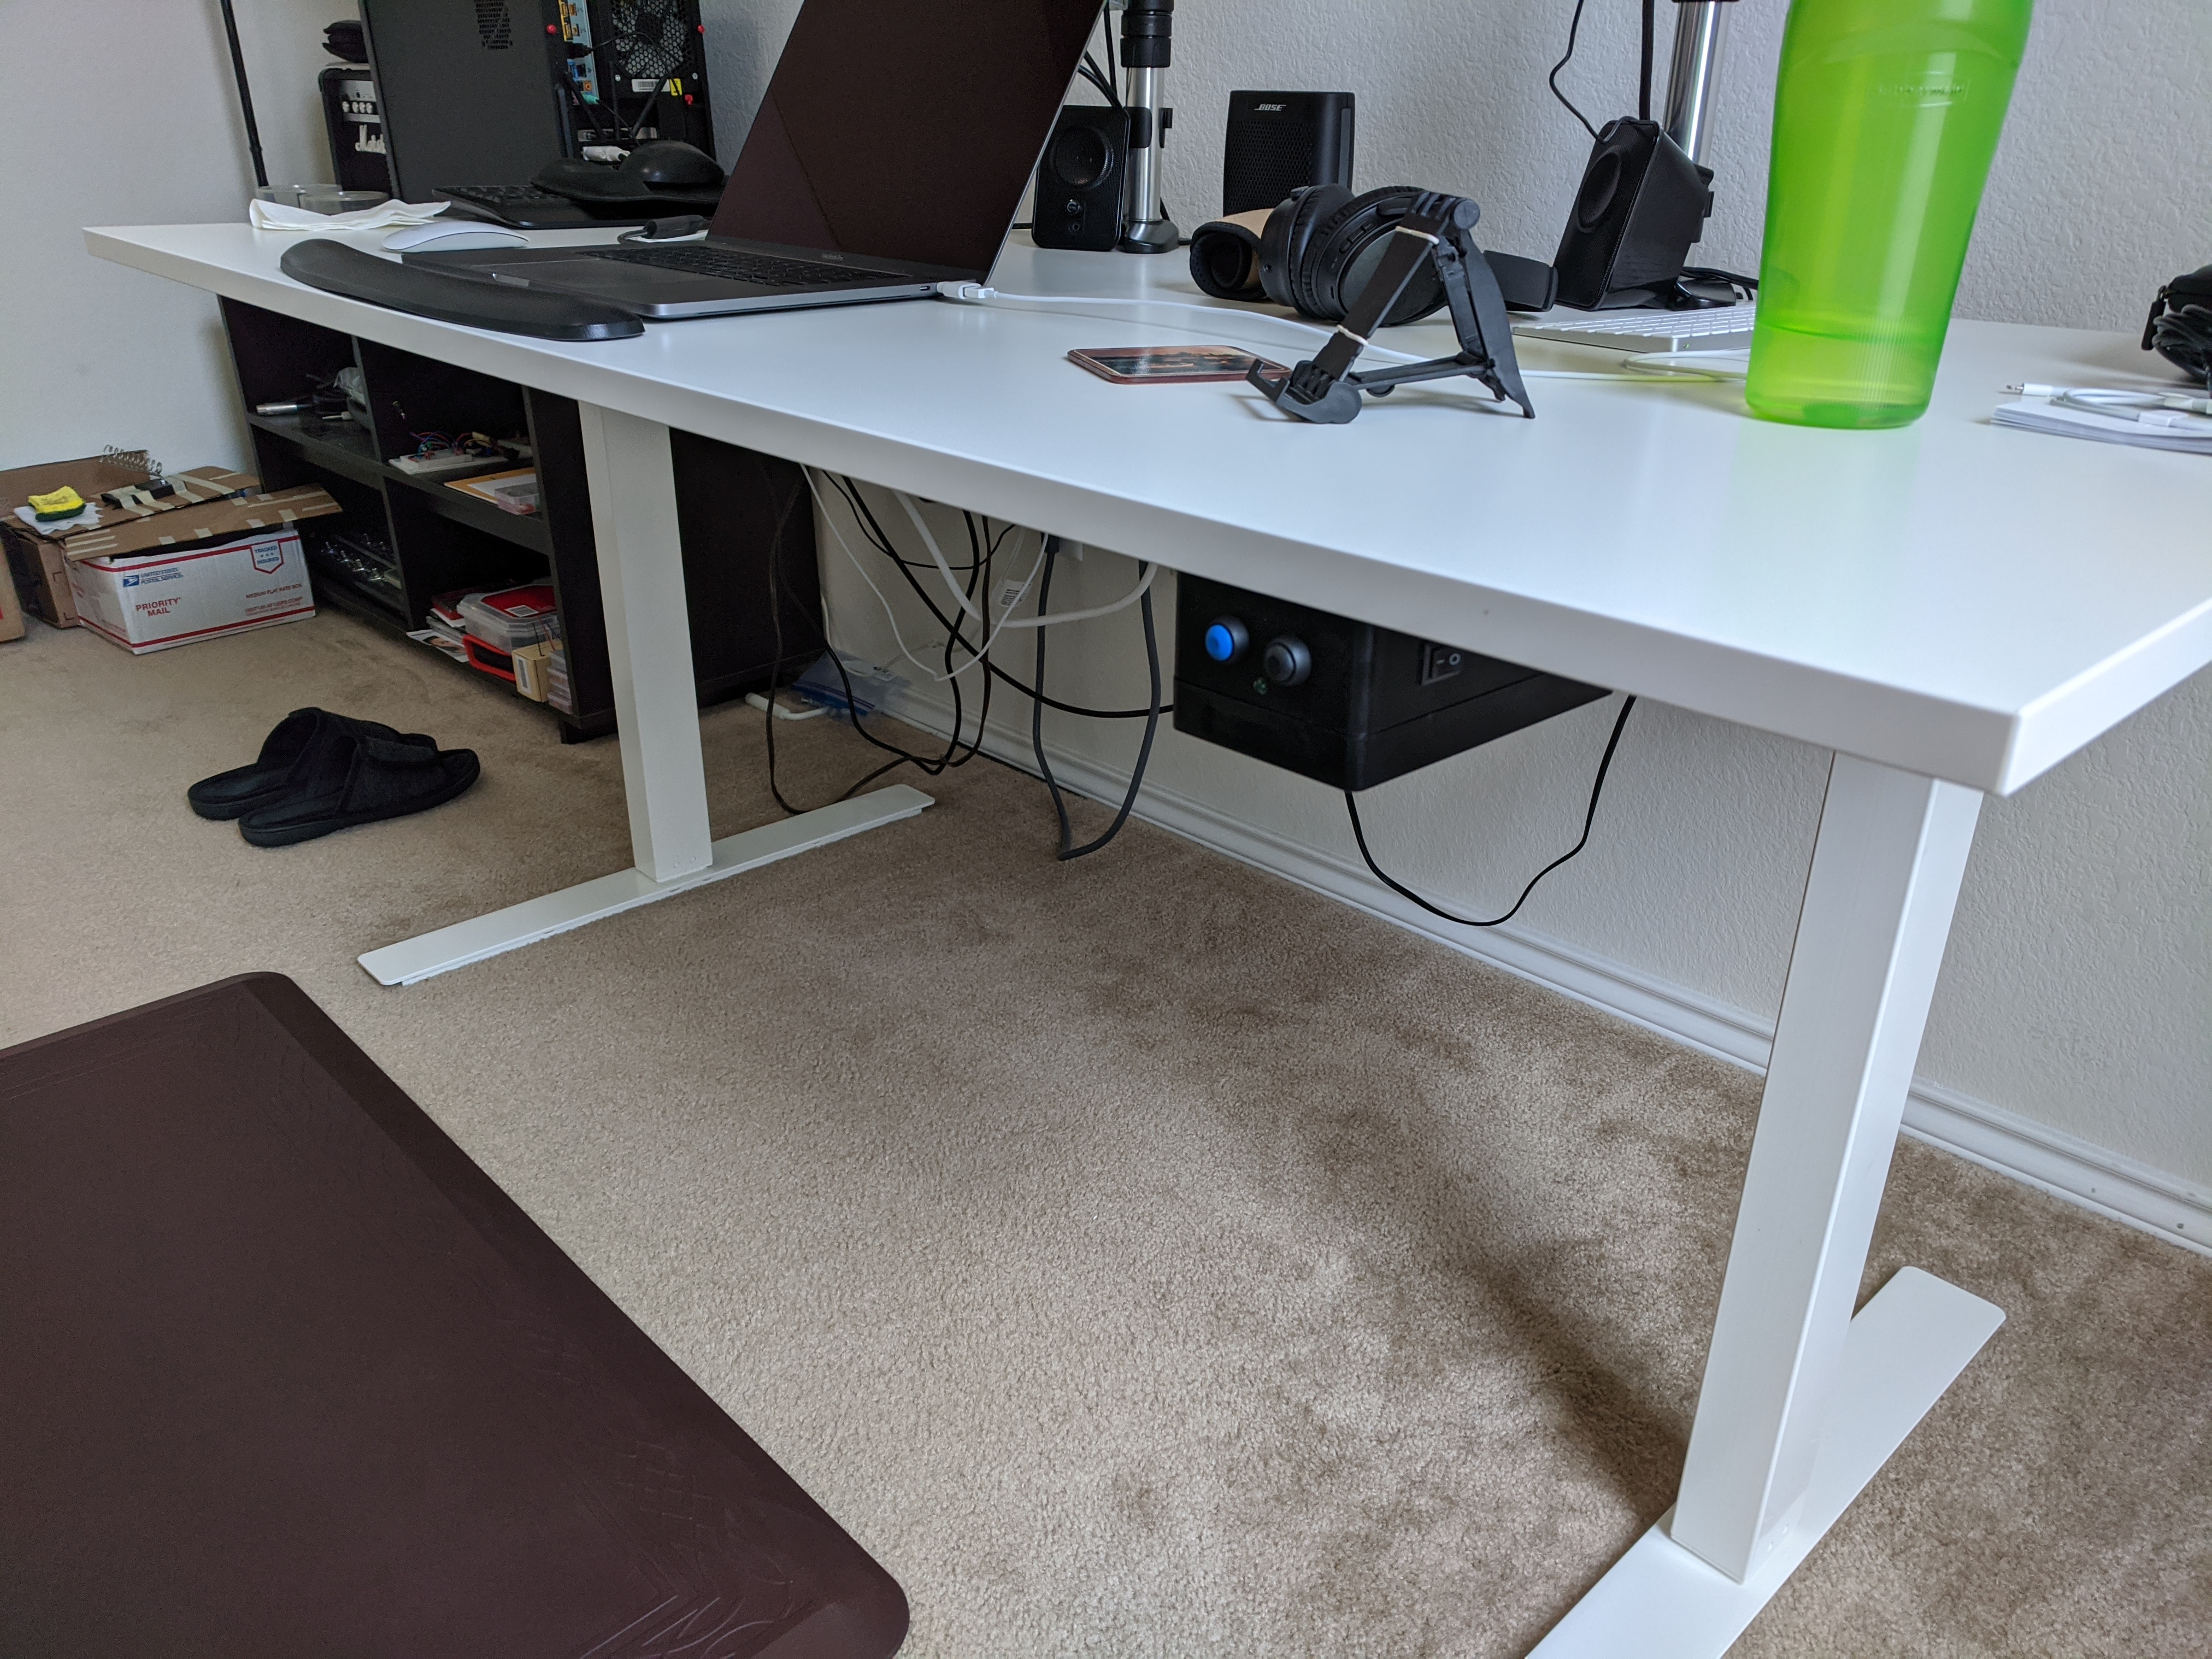
Almost there!, simply install the buttons onto the enclosure, pass the motor wires through the hole in the back, and re-plug the cables inside of the enclosure. Remember to install the top part of the enclosure to the desk first or it’ll be tough to drill with the circuit already inside, just try to think ahead and you’ll be fine!

Demonstration of the Auto-Raise Feature
Demonstration of the Auto-Lower Feature
That’s it!, what did you think of this approach?, let me know in the comments, please share with me if you made it, and if you have any questions feel free to ask.
Quick Update 2021/03/13
Upon needing to do a second desk I decided to improve on the Motor Driver Carrier - and a few other components. I also used Arduino’s internal ATMEGA328P processor (so that we can have a smaller form factor, but this is optional), and finishing it up on a solderable board. Check out my latest post I motorized my Ikea SKARSTA standup desk with an Arduino UNO. if you’re interested!
Quick Peek:
References
Similar Projects:
Comments